


Tap, Pay, Done: Make Payments to Your Favorite Merchants on OnestPay
From wallet to checkout, experience seamless payment. Manage your funds and complete purchases in just a few taps—OnestPay keeps it simple.

Let’s be honest—paying for your favorite brands shouldn’t feel like a chore.
Whether it’s buying a new gadget, or gifting something special, OnestPayTM is built to make your shopping seamless, smart, and satisfying.
In this quick guide, I’ll walk you through how easy it is to pay merchants using your OnestPayTM Merchant Credits—and why it’s way better than traditional methods.
Key Highlights
- How to Pay Merchants in OnestPayTM (Step Guide)
- Final Tips
- Your Purchase, Your Control
Why Use OnestPay for Merchant Payments?
OnestPayTM isn’t just a wallet. It’s your smart financial companion.
With every purchase, you unlock instant savings and complete control over how and where your money is used.
Here’s what makes us stand out,
- Pay with Credits at Discounted Rates
- Zero fees for using Merchant Credits
- Use OnestPayTM wallet for seamless online payments
How to Use OnestPay to Pay Merchants
Wherever you are, you can shop and pay on the go. The process is secure and fast.
Online Purchases – Step-by-Step with OnestPay
Here’s how to go from linking your bank to completing a merchant payment—all in just a few clicks.
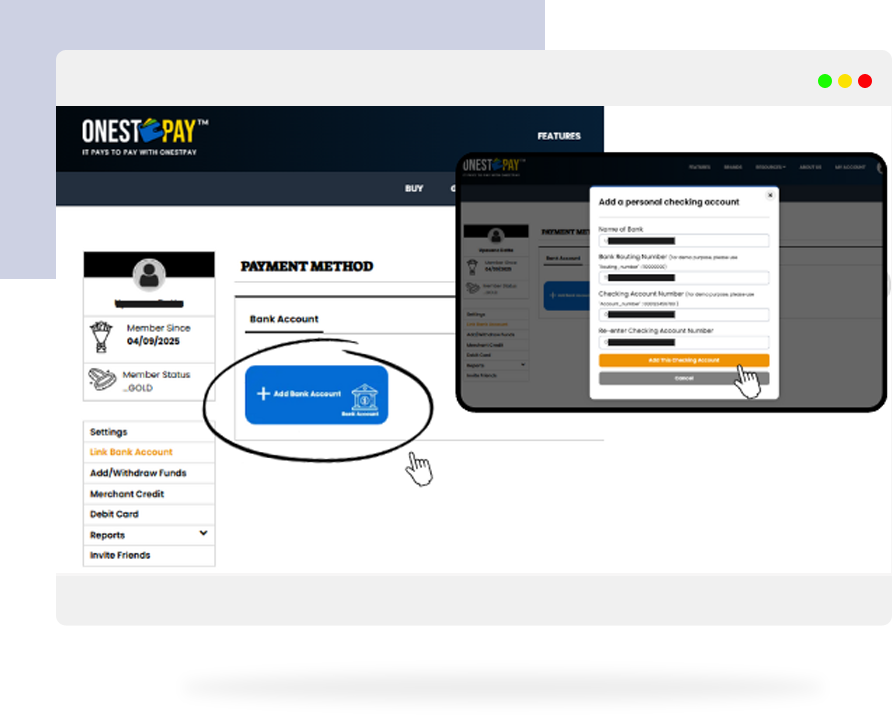
01 Step 1: Link Your Bank Account
Head to the “My Account” section and click on “Link Bank Account.”
Fill in your
- Bank Name
- Routing Number
- Account Number
Then click “Add this Account.” Your bank account is now successfully linked.
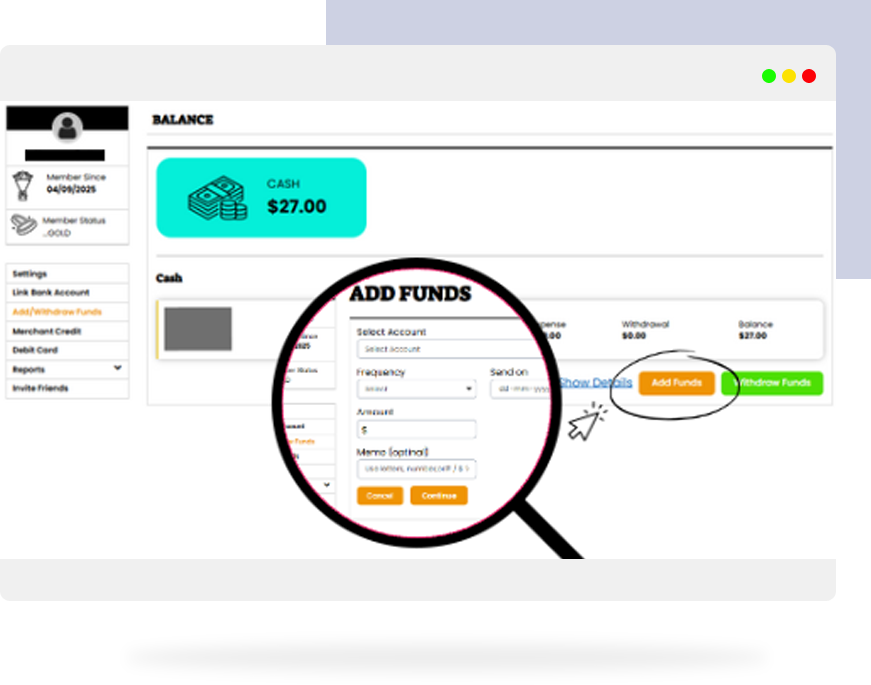
02 Step 2: Add Funds to Your Digital Wallet
Still in “My Account”, go to “Add/Withdraw Funds.”
Click on “Add Funds” to fill out:
- Select Account
- Frequency
- Send Date
- Amount
- Memo (optional)
Click “Continue.” Once complete, your wallet is loaded and ready to use.
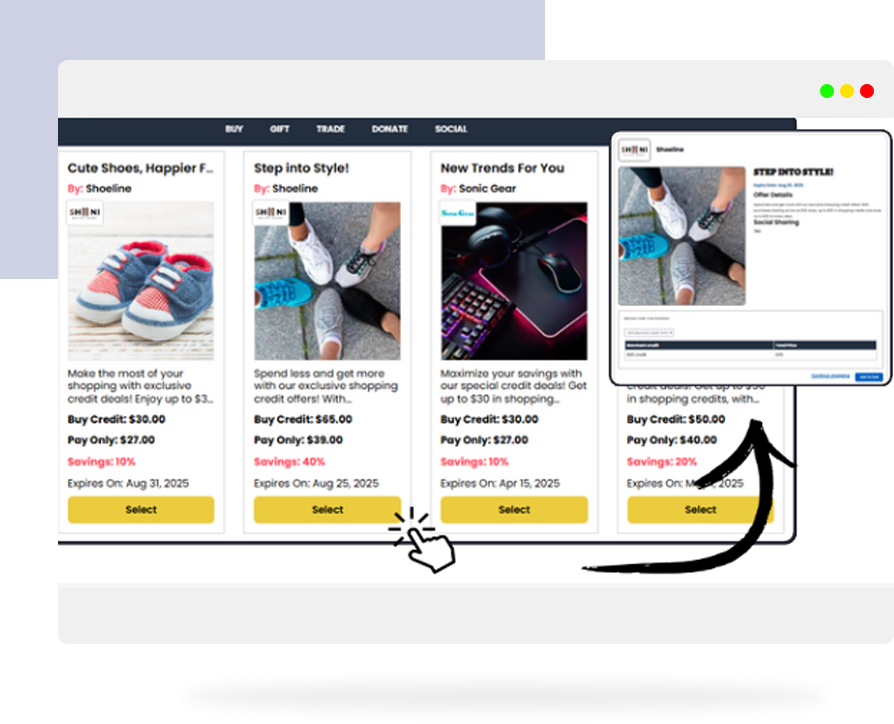
03 Step 3: Make Your Purchase
- Go to the “Buy” tab and select a merchant deal you love.
- On the Offer Details page, review the table with:
-
- Merchant Credit
- Total Price (your discounted deal)
Click “Add to Cart” or “Continue Shopping” if you want to explore more.
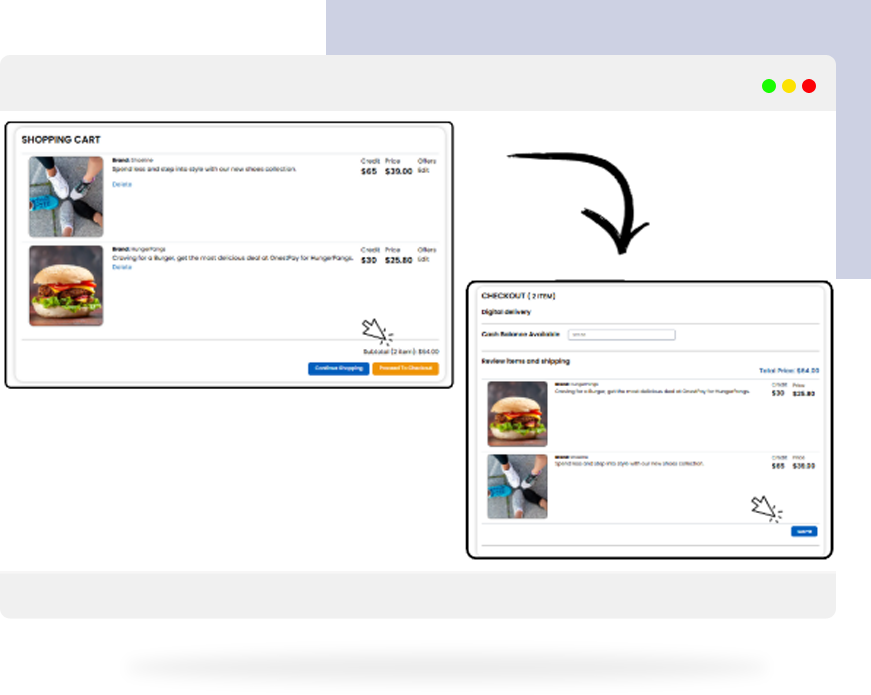
04 Step 4: Checkout
When ready, visit your Shopping Cart and hit “Proceed to Checkout”
- The Checkout Page displays:
- Cash Balance Available
- Review Items section with Credit and Price info
- Confirm everything and click “Submit.” That’s it—you’ve made a smart, seamless payment with OnestPay!
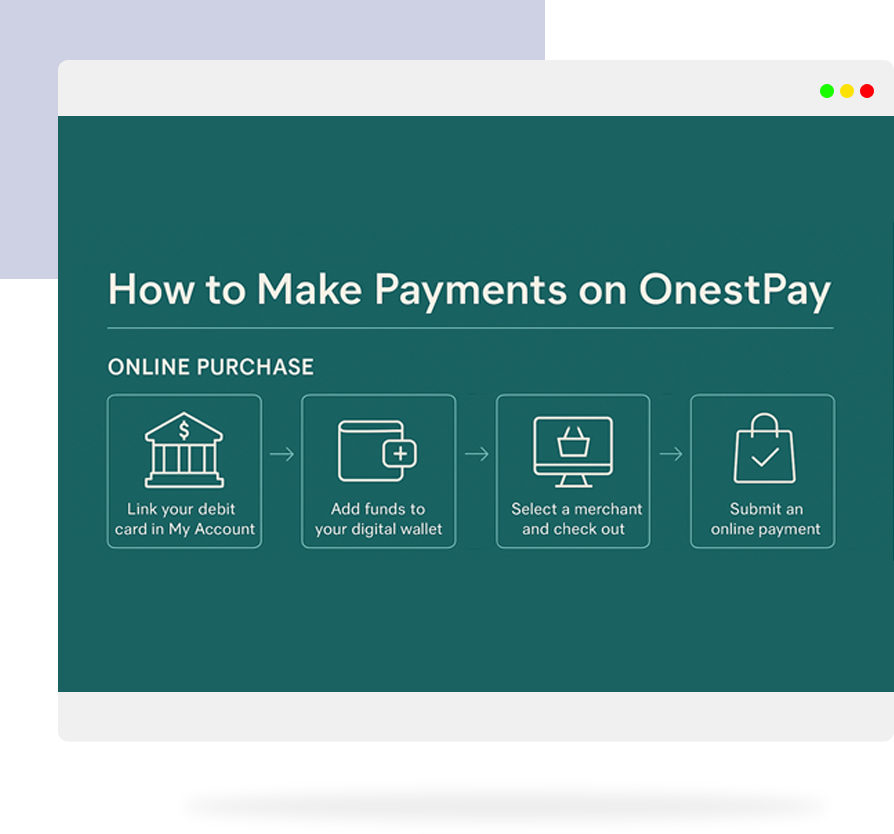
05 Payment Process
We’ve provided a simple flowchart-style graphic below for your ease of use.
No Hidden Fees, Just Smarter Spending
We believe your rewards should stay with you. That’s why there are zero transaction fees when using your merchant credits for payments.
What If a Payment Fails?
First, check your
- Credit balance
- Linked account details
- Card expiration info
Still having trouble? Our Customer Support Team is just a tap away. Or, you can head over to our FAQ Page for quick answers.
Final Tip | Keep an Eye on Your Balance
Head over to your OnestPayTM Account Dashboard to:
- Check your available credits
- Link new bank accounts
- Track your payment and shopping history
Your Purchase. Your Control.
With OnestPayTM, you’re not just making a payment—you’re making a smarter financial choice. Every tap is backed with flexibility, rewards, and savings.
Ready to shop smarter?
Explore amazing merchant deals on the Buy Page and start saving today!